Clothes making!
Jon and I have both dabbled in clothes making a little bit with Halloween costumes and such, so to say that this is something we have never tried before is a bit unfair. But we had never made THESE things before! So it still counts :)
Since Kate's birthday was approaching, I really wanted to make her a dress. I didn't document this process as closely as we did Jon's project, but you'll still get the idea.
I took a picture of the fabric before I started, but it's on our other computer and I'm too tired to go get the file. I'll let you use your imagination. It's just basic red with white polka dots :)
and here is Jon's fabric that he picked out for his project:

For Kate's dress, I started off looking at a dress she already had in her closet and based my pattern off of the simple ruffled skirt sewn into a lined bodice.
I measured Kate around the waist and from her shoulders to her tummy so that I knew how big to make the bodice. I always cut two layers of the front out first and then cut two back left sides and two back right sides, so that they will overlap a little bit when the buttons are sewn on.

The skirt has a front and a back that I make 2x as wide as her waist so that it will gather nicely. I also cut a slit in the back, double fold and sew it so that it will overlap with the button flap on the bodice.

The skirt has a front and a back that I make 2x as wide as her waist so that it will gather nicely. I also cut a slit in the back, double fold and sew it so that it will overlap with the button flap on the bodice.

After sewing the top shoulders together, around the neck, and sewing up the sides, I pinned in the skirt and sewed it into the bodice
I decided with Michelle O'Keefe that Kate's dress definitely needed some more ruffles along the bottom. We stopped by Beverly's and got this cute trim to sew along the bottom edge.

We also added 3 cute decorative pearl buttons on the front.


We also added 3 cute decorative pearl buttons on the front.

Then I cut out some little ruffle cap sleeves and sewed those into the unfinished arm holes.

And here it is all finished! Ready to go for her birthday this weekend :)

Jon went along with our polka dot theme and picked out this reverse green and white dot for a necktie. Since he wears dress shirts and ties to work now, we thought his fashion design students would be impressed.
I found this tutorial online (through Pinterest) and it seemed pretty simple!
Jon cut out the pattern pieces


and we had to do some creative folding for the bias because we bought the fabric before looking at the measurements on the tutorial.


Jon pressed, pinned and cut out the pieces for his tie.

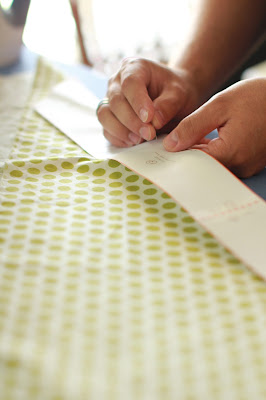


Following the instructions on the blog he ironed on the interfacing, pieced it all together and sewed up the edges.


So proud of my fearless sewing guy!
Jon then pressed and pinned the lime green lining fabric on the inside, but he wasn't too excited about a hand-sewn slip stitch so I did that part :)
Then he pressed in the edges (and you would fit in your heavyweight stabilizer here) and pinned the center together so that I could do the final slip stitch by hand all along the back.

It turned out pretty amazing!

Overall the tie was super simple to make and the tutorial was very well put together. I'm glad that I know how to make Jon ties now! Ohhhh, the possibilities for coordinating family Sunday outfits are endless...
July's exploration = successful!
July's exploration = successful!
1 comment:
I can't tell you enough how dang cute the dress and Jon's tie turned out. What a fun project!
Post a Comment