Showing posts with label sewing. Show all posts

Wednesday, July 31, 2013

July - The Month Of...

Clothes making!

Jon and I have both dabbled in clothes making a little bit with Halloween costumes and such, so to say that this is something we have never tried before is a bit unfair. But we had never made THESE things before! So it still counts :)

Since Kate's birthday was approaching, I really wanted to make her a dress. I didn't document this process as closely as we did Jon's project, but you'll still get the idea.

I took a picture of the fabric before I started, but it's on our other computer and I'm too tired to go get the file. I'll let you use your imagination. It's just basic red with white polka dots :)

and here is Jon's fabric that he picked out for his project:


For Kate's dress, I started off looking at a dress she already had in her closet and based my pattern off of the simple ruffled skirt sewn into a lined bodice.

I measured Kate around the waist and from her shoulders to her tummy so that I knew how big to make the bodice. I always cut two layers of the front out first and then cut two back left sides and two back right sides, so that they will overlap a little bit when the buttons are sewn on.

 
The skirt has a front and a back that I make 2x as wide as her waist so that it will gather nicely. I also cut a slit in the back, double fold and sew it so that it will overlap with the button flap on the bodice.
 

After sewing the top shoulders together, around the neck, and sewing up the sides, I pinned in the skirt and sewed it into the bodice

I decided with Michelle O'Keefe that Kate's dress definitely needed some more ruffles along the bottom. We stopped by Beverly's and got this cute trim to sew along the bottom edge.


We also added 3 cute decorative pearl buttons on the front.


Then I cut out some little ruffle cap sleeves and sewed those into the unfinished arm holes.


 And here it is all finished! Ready to go for her birthday this weekend :)

Jon went along with our polka dot theme and picked out this reverse green and white dot for a necktie. Since he wears dress shirts and ties to work now, we thought his fashion design students would be impressed.

I found this tutorial online (through Pinterest) and it seemed pretty simple!

Jon cut out the pattern pieces


and we had to do some creative folding for the bias because we bought the fabric before looking at the measurements on the tutorial.

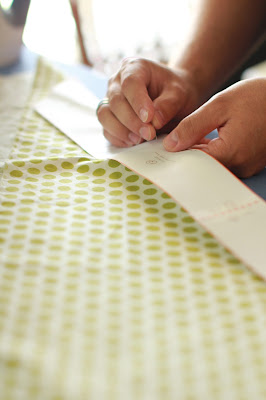
Jon pressed, pinned and cut out the pieces for his tie.


Following the instructions on the blog he ironed on the interfacing, pieced it all together and sewed up the edges.


So proud of my fearless sewing guy!

Jon then pressed and pinned the lime green lining fabric on the inside, but he wasn't too excited about a hand-sewn slip stitch so I did that part :)

Then he pressed in the edges (and you would fit in your heavyweight stabilizer here) and pinned the center together so that I could do the final slip stitch by hand all along the back.


It turned out pretty amazing!


Overall the tie was super simple to make and the tutorial was very well put together. I'm glad that I know how to make Jon ties now! Ohhhh, the possibilities for coordinating family Sunday outfits are endless...

July's exploration = successful!

Thursday, May 16, 2013

Warm Things

The days are fast approaching to baby Kate's first camping trip! We will be heading up north where it could still be quite chilly this time of year. I've been looking for some things on clearance as we've been out-and-about so that she can be cute and toasty (on a budget!)
 
I've really been wanting to make her a fleece hat, so I decided to dig through my fabric box and pulled out some remnants from a project I did for my niece 2 Christmases ago. I'm all about purple and blue swirls :)
 
(Here is that original Christmas post. You'll have to scroll about halfway down... I made her a hat, scarf and blanket that all matched with Tinkerbell fleece. Fabric from Bev's. Even before I worked there, I was a fabric lover.)
 
The hat took me about 5 minutes. I measured Kate's head (17 inches!) added 2 inches to allow for seam and some give, sewed a fabric tube (just one straight seam line) that would make the length be double the finished height of the hat, then folded it right side out, in half, cut fringe on the end, and tied a string of fleece around the fringe, making a pom-pom, and bam! Adorableness:
 
Mid-breakfast-cream-of-wheat-face
 I've also been looking for some good warm boots on sale. Kate has outgrown the ones she actually wore during the winter (which in California is about 2 weeks in January) so clearance seemed the best place to search. Unfortunately nothing has turned up yet. Since the hat was so quick and I still had some fleece leftover, I figured I could come up with some booties!
 
First I measured the length of Kate's feet. Sweet girl, only 4 inches! I added an extra inch to allow for seams. I cut two 5in x 3 in rectangles and rounded out the corners. These would be the soles:
 
 
Then, using the sole length as a starting point, I cut out the shape of a boot x2 and pinned them right sides together. I kept the ankle nice and tall so that it will cover her leg a little since Kate is a master sock-escape-artist.

 
I sewed up the back and sewed up the toe/front, leaving the ankle and bottom open.

 
Then, starting from the back seam, I pinned the sole all the way around the bootie edge.

 
When pinned, it looked like this. All of the "inside/wrong side" of the fabric is facing out:

 
I sewed around the bottom/sole and took out the pins:

 
Flipped the bootie right side out:

 
Cozy camping slipper booties! These should keep her tootsies roasty-toasty by the campfire at night over a nice layer of socks.
 
 
She was too wiggly for me to get a really good picture of the finished ensemble.

 
They fit snug as a bug in a rug!

 
You get the idea :)


Sunday, February 10, 2013

The Haps

There have been a lot of exciting things happening at The Alston household lately. It's usually a bunch of little things, so it seemed a post where I squished them all together was necessary :)
 
So - backing up to January - our friend Ali had a birthday party! We were supposed to dress up as something that started with the letter A.
 
Jon was Amish:
 
 
I was Alaska
(yes, those are moose earrings, a moose pin and a moose bracelet. All courtesy of my mother-in-law's jewerly box)

 
Kate was an Apple
(those are "leaves" on her head)

 
At the end of January we celebrated 9 years of dating!
Because our first date was eating at Taco Bell and seeing Cheaper by the Dozen in theaters, we always do a re-creation of sorts by eating at some fast food restaurant and going to a movie.
 
This year was the Squeeze Inn and Les Miserables.
 
Jon's burger:
 
 
We heard Les Mis was good, but both of us were absolutely blown away. There were some incredible scenes and I think I pretty much cried the whole time. SO glad we saw this in theaters!
 
 
I've also been working on a lot of sewing projects lately!
 
Here's the ribbon detail on my latest endeavor. It's not quite finished yet, but I will post more pictures when it's done :)

 
Then at work, my friend Savannah had a birthday and I made her a sponge bob themed apron! She is pretty much the biggest sponge bob fan I've ever met.


The idea was to make the apron INSPIRED by sponge bob, but not necessarily with any sponge bob fabric. It all started when Savannah and I were working together in fabrics one night and saw this green pineapple fabric. It's actually really fancy looking, but the pineapple made me think of how sponge bob "lives in a pineapple under the sea" ... and the dream was born.
 
Here is Savannah in the finished apron at work on her birthday:

 
The collar is from one of Jon's dress shirts that needed to be retired. Jon helped me by creating the applique red tie and I sewed it on. I love the effect!
 
 
The yellow pockets and straps are in a fabric that I thought looked like a sponge :) We wanted the apron to be feminine, so we added a ruffle to the bottom in brown like sponge bob's pants. This was Jon's idea. I'm so glad he helped collaborate with me on this!
 
 
The whole apron is reversible. The back of it is "bikini bottom" inspired:

 
I've also been doing a lot of Yoga lately, so I made my own yoga mat shoulder strap with some of my scraps:

 
And my FAVORITE project of late is a Sunday book for Kate.
 
We started with the idea that Kate is now getting more active and observant, but obviously needs some stimulation at church since she's not quite old enough to listen to the talks. In lieu of bringing toys (that she will make noise with and throw under the pews) I wanted to make her a "quiet book" that she can look at, chew on, and that will be reverent, but still fun as she grows.
 
We drew out the ideas and plans in a notebook:

 
We got some scrap flannel at Bev's and cut the pages out. I love my rotary cutter and Olfa mat!!

 
Jon helped me design the pages on the computer:

 
Then, using photo transfer paper, we printed out the page designs and ironed them on to the flannel.
 
 
From there I sewed the pages together (right sides together) then Jon helped me turn them out, iron the edges, and I did a top seam to finish all the pages. Jon had the idea to bind it with some colorful fabric, so I sewed an edging piece and Jon bound it together. I'm so happy with how it turned out!

 
It is made completely out of cloth, teaches basic gospel principles, designed and bound by me and Jon, and is washable :) Perfect.
 
Kate also had her 6 month check up this week. She had her last round of immunizations including the flu shot. She wasn't too happy about her shots, and even had a little fever that night (which is totally normal) but within a day she was back to her happy, smiling self :) She is in the 19th percentile for weight, 40th percentile for head circumference and 51st percentile for height. Growing nicely! The doctor is really happy with her progress and now we don't have to see the pediatrician again until she is 1 year old. Awesome!
 
My last recent thing to share is that Jon and I had this awesome groupon to get 2 canvases (16x24 size) and they finally came this week!
 
We got our rad family picture for the year of exploration printed (which we hope to hang up in our own future living room) and a portrait of Margo that I took about a year ago :) Inspired by the Goffenson's canvas portrait of their cat, Spock. The Margo portrait is currently hanging in Kate's room.

 
That's what's new with the Alston family.
More updates coming soon!