Jon once again. I offered to do this blog since twas I who requested the making of paper (and since I know a little more about the process than the Wife). Sorry this is long, but I'm combining what was supposed to be two posts into one. So, here we go.
First, a (very) simple explaination of how paper is made:
- Get a mold and deckle (I'll explain later)
- Get some plant matter (you can use ALMOST any plant material); boil for hours
- Beat boiled plant matter to pieces (usually done with mallets and sticks . . . yah, not us)
- Take beaten matter, mix with water, and sift (kind of like gold pannig)
- Press between felt, and let dry
Sounds easy right? Of course it does! But, alas, beautiful things never are. So this is what happened.
At the beginning of February, rather than buy a mold and deckle, we decided to make one. I don't know why they have these weird names, but a mold and deckle are simply a paper form. Whatever shape you want to make it in, that's what it can be. The mold is the main section with a screen over the top to catch the plant matter fibers and form the paper. The deckle is what keeps the fibers from going over the edge of the mold (it's an outer frame to catch the fiber).
Here's what you need to make a mold:
- 1' x 2' wood (length depends on how big you want the mold to be)
- L brackets
- mesh (copper wire mesh works best since copper doesn't rust, but we used fiberglass screen mesh since it was easiest to find, and WAY cheaper)
- corner molding (for the deckle)
And you'll need a miter saw. And some glue. And some clamps to hold stuff while drying.
Now, the following construction is/was not the easiest way to do it. And looking back, I would have done it differently. But such is life.
We decided to make the mold like a true frame, and miter the corners to 45 degrees.
Then some sanding.
After a good sanding, to make sure the edges line up nice and flush, just apply some glue and clamp together
We have these awesome framing clamps that make a perfect 90 degree angle. I would recommend using these if this is the way you plan to make a mold. I don't know why you would be making one, but if for some reason you do . . .
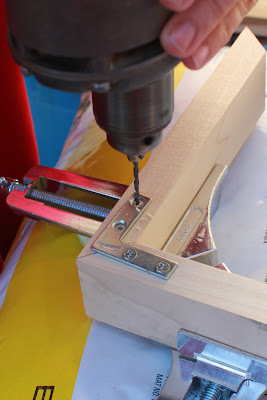
Once the two sides of the mold were clamped, we drilled some holes for the L brackets:
Her drilling skills are improving. Not so sure about her confidence . . .
And some screws:
(which apparently she enjoys more than drilling)
Add the two sides together:
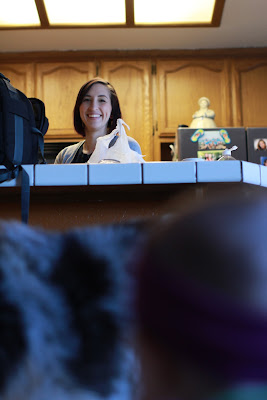
Of course, anyone who knows Steph, knows her attention span is that of a goldfish, so she started taking pictures of the dogs:
And we're back. As I said before, I didn't pick the easiest way to do this, so I added in another complex step, just because I enoy pain and sorrow and all the horrible emotions of life.
I wanted the deckle to fit perfectly over the mold, so that, when the deckle was on the mold, there would be only the screen showing (I'm very particular about stuff like this, I guess I get that lunacy from my mother). Because of this, we needed to do a little table sawing to thin out only the top half of the mold for the deckle to fit snug. Now when working with a table saw, it's all about attitude:
Clearly, we're experts.
And a little sanding for good measure; again, so the deckle will fit snuggly:
For some reason we didn't get pictures of the deckle being made, but here it is half way:
AND, the final product:
I will say, this picture makes it look WAY more awesome than it is. We used brass nails to hold the screen down, since brass, like copper, won't rust. The big reason to avoid rust is because it will leave traces of the rust and other particles in the water which will cause Foxing on your paper (small blotches of discoloration)
NOW, for the actual paper making.
First off, get someone to supervise you, it makes the whole process easier. We had Katherine:
Sometimes she disapproved of our work:
And sometimes she got so frustrated with us, she started to cry:
But, then again, Margo didn't really approve of our work either:
And, as always, Shasta didn't care (she only wanted to play):
While under this scrutinizing supervision, we started with some tree bark.
For the life of me I cannot remember the name of this tree. I collected it, with my "boss" Stephanie Sauer (owner of Copilot Press) up in Grass Valley. These trees are everywhere up there. Beautiful trees, and lovely bark. Oh well, I'm sure someone can let us know.
To help the boiling process, it's best to cut up your plant matter into 1/2-inch pieces. The bark was brittle, so we just crumbled it up:
Like the table saw, it's all about attitude:
And then boil. Here's why you boil: with plant matter, like leaves or stalks, there is a lot of gooey matter in the center, matter that isn't usable for paper making; you want the skeletal fibers because they latch together when agitated and laid on top of each other.
We boiled this stuff for about two hours. Depending on how thick and dense your plant matter is, you may want to boil more. No more than three hours. Then a nice rinse until the water runs clear. Check if the plant matter is squishy and slimy. If not, a second boiling for 30-45 minutes can be done again. We didn't (but probably should have). Here's what boiled bark looks like:
Then it was off for a good beating. The beating process is to reduce the matter to a more usable size, tiny fibers that will link together, but that you won't really see. It's good to do this with some water, so that the fibers can move around more freely (I used to much water I think). Since we are modern individuals, rather than mallets or sticks, we used a blender:
The rest is pretty easy. Add your "Pulp" (the ground up plant matter) to a tub of water (the ratio is not exact, it depends on your material, we had a hard time figuring that one out):
And agitate to get the fibers moving around in the water:
The rest is all in the wrist. Take the mold and deckle at a 45 degree angle, dip it into the pulp mixture, and roll your wrist towards you while pulling the mold towards you, unitl the mold is level. Then lift:
Remove the deckle, and press into the felt and lift:
As you can see, my attempt didn't go so well.
Now Steph's turn:
And here's what one piece of this paper looks like once it's dried:
To say the least, I don't think we'll be making more paper anytime soon . . .


